
How We Keep our Help Center Articles and Screenshots Up to Date with Claude and the Zendesk MCP Server
Sorin Alupoaie · · 12 minutes read
Shipping a feature is the easy part. Keeping the Help Center true to it is where things slip.
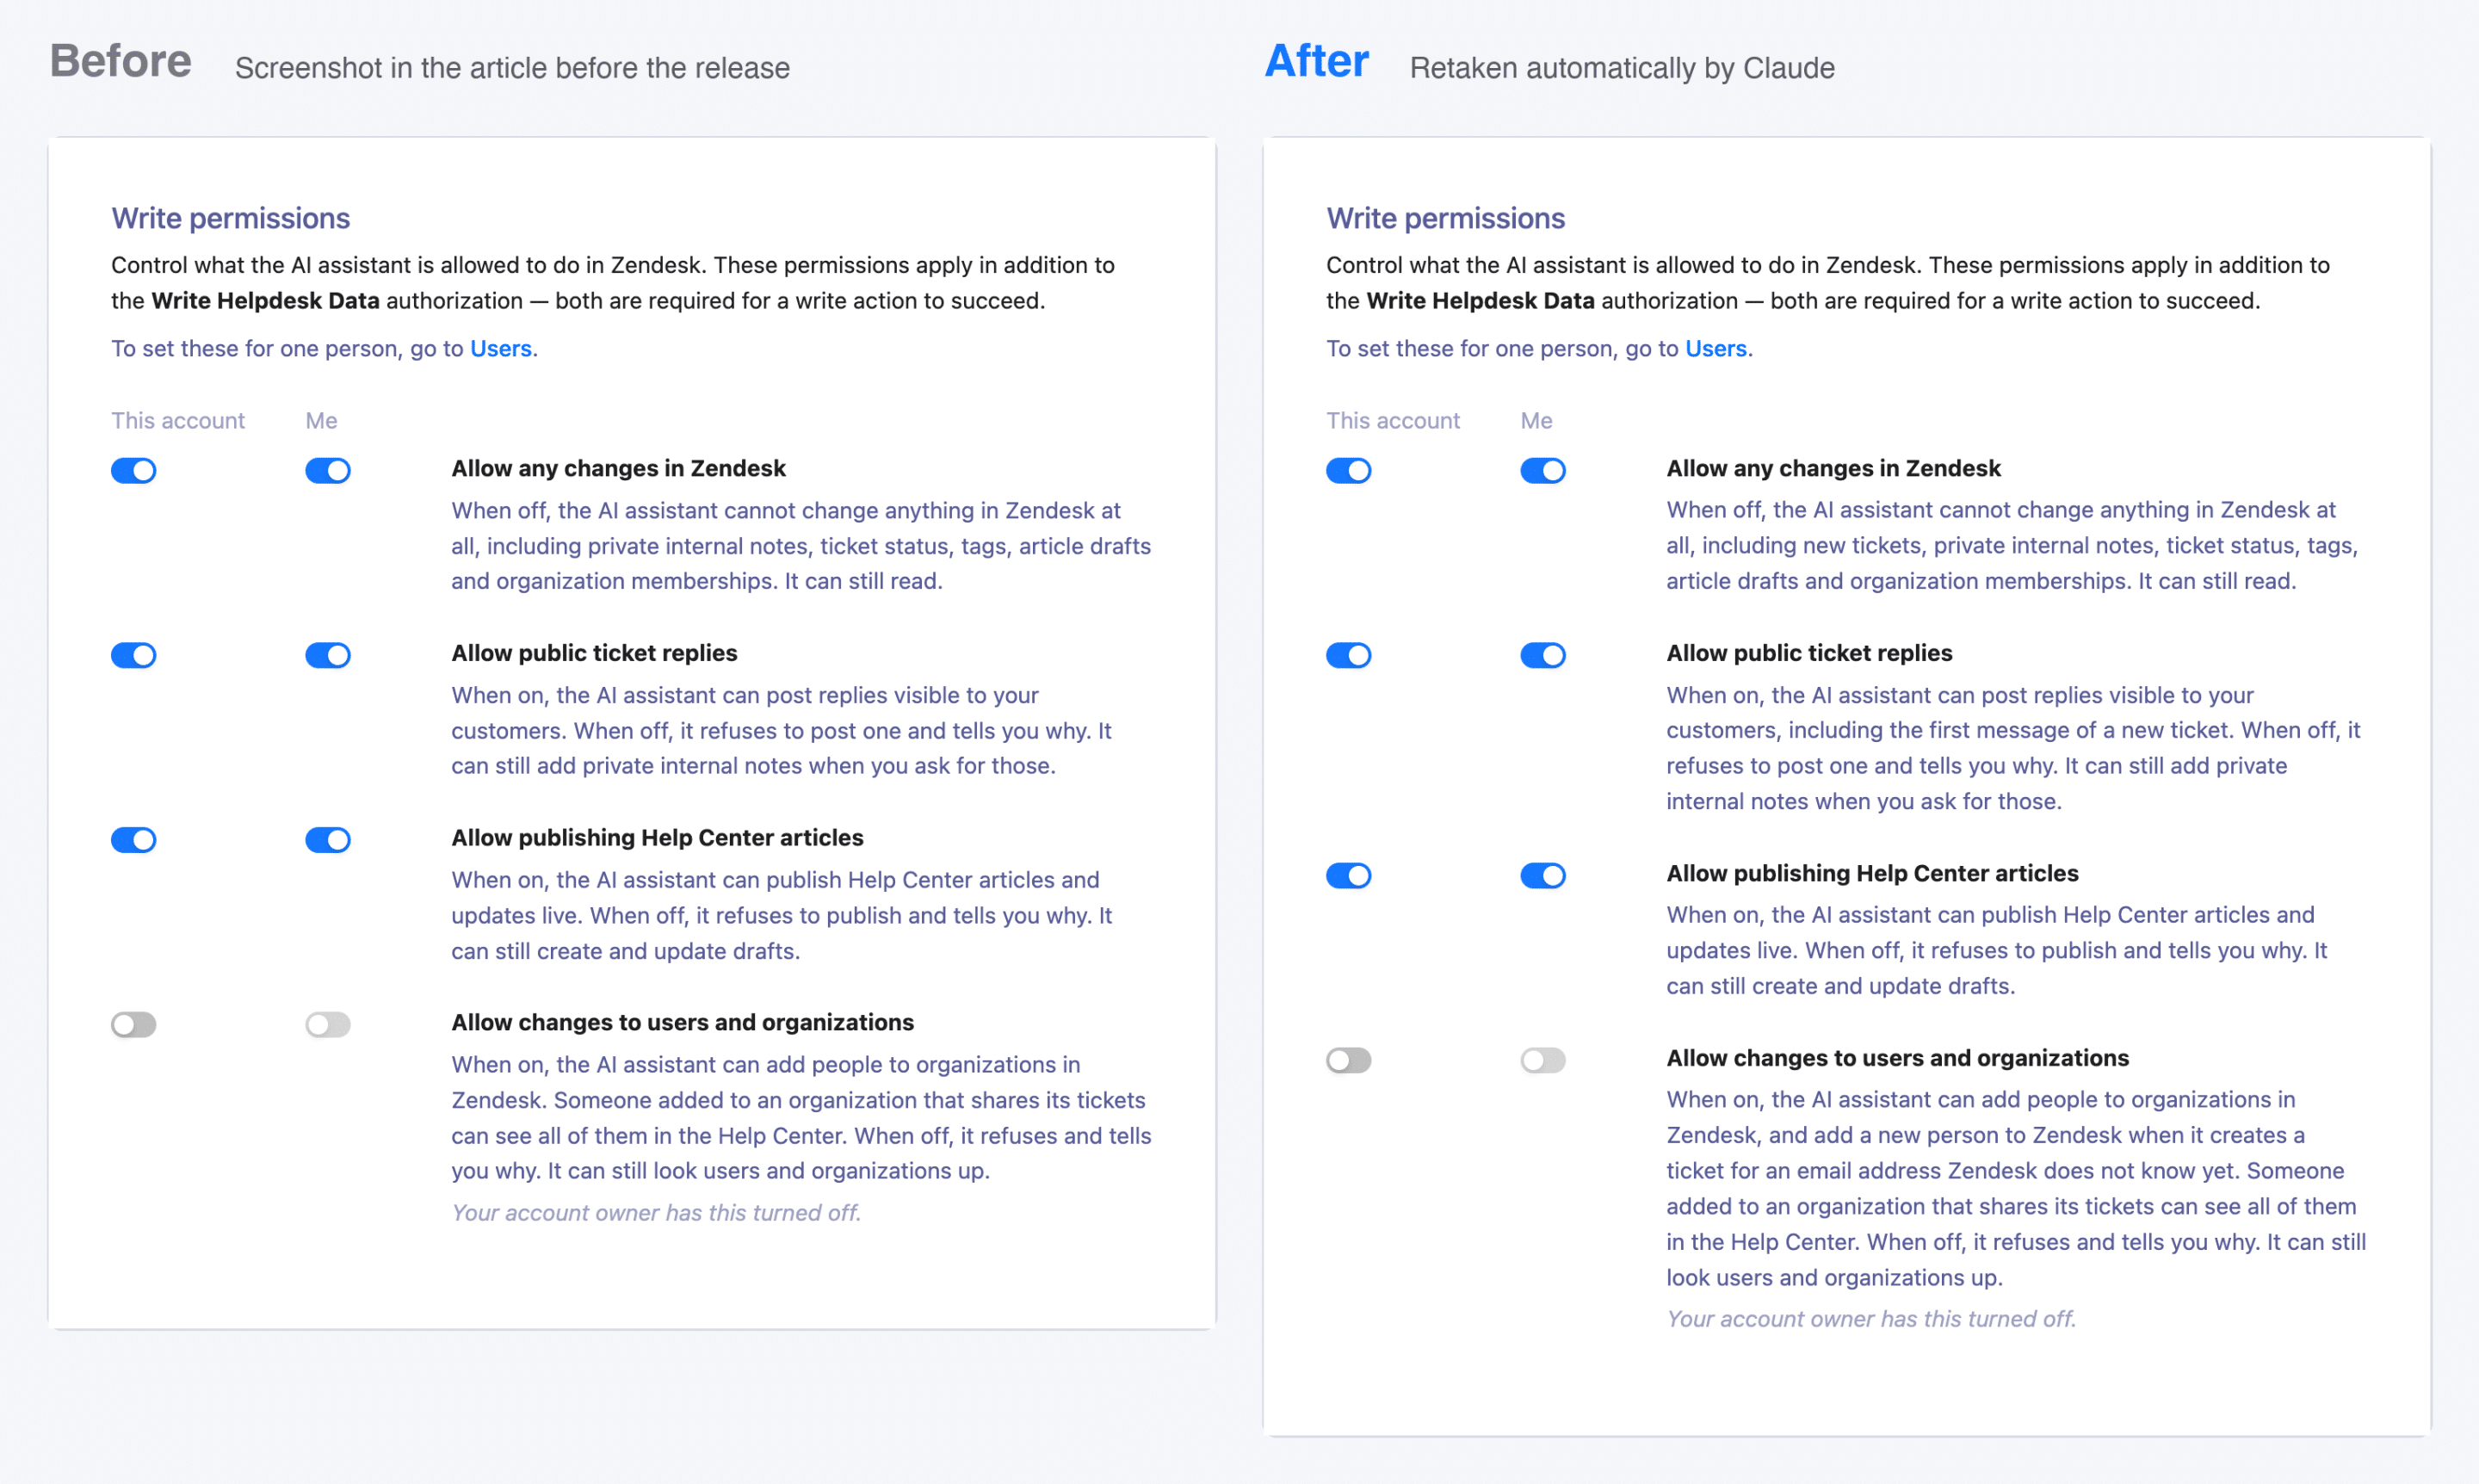
Last week we released a new capability for our own product: the AI assistant can now create Zendesk tickets. On release day, 8 of the 24 articles in that product’s Help Center category were out of date, and two of their screenshots showed settings text that no longer matched the app. Nobody had to open a spreadsheet or click through the Help Center to find them. Claude found them, drafted the changes, retook the screenshots, uploaded them and published the articles, with a person approving each step.
This post walks through that workflow, step by step, with the exact Swifteq MCP Server tools we used at each point, so you can run the same process on your own Help Center.
Why Help Center updates are hard
Every knowledge manager knows the pattern. A release changes a label, a setting or a limit, and the change ripples through the Help Center in ways nobody tracks:
- Finding what changed is the real work. A new option can make a sentence in the FAQ wrong, a row in a limitations list outdated and a troubleshooting table incomplete. The obvious article is rarely the only one.
- Text edits are small but many. Each article needs a careful, consistent edit in your house style, and every edit is a chance to break formatting or links.
- Screenshots age silently. Nobody searches images. A screenshot showing old wording can stay live for months.
- Retaking screenshots is slow. You need the right account, the right settings, the same crop and the same resolution as before, and you have to do it without changing anything in a live account.
- Publishing is risky. Pasting into an editor, uploading images and replacing old ones by hand is where mistakes happen.
The workflow below takes each of these in turn.
What you need
- Claude Code, Anthropic’s coding assistant, connected to the Swifteq MCP Server. The text steps work in any MCP client, including Claude on the web. The screenshot steps need Claude Code, because they take screenshots in a browser on your computer and upload image files from it.
- Write access in the MCP Server settings: Allow any changes in Zendesk, plus Allow publishing Help Center articles if Claude should publish live rather than save drafts.
- A short description of what changed in the release: new labels, new options, what is no longer true.
Step 1: Find every article the release affects
Start by telling Claude what changed in plain language, then ask it to find every article that mentions any of it. The key is to search broadly and then read the full text, because search alone only shows titles.
MCP tools used:
list_help_center_sectionsto see how the product’s category is organized.search_help_center_articlesto find candidate articles by keyword (for example the setting’s name, the feature name, and phrases like “cannot” or “not available” that often hide in limitations lists).export_help_center_articlesto pull the full body of every article in the category in one go, so Claude can scan the actual text, not just titles.get_help_center_article_contentto read a single article in full when it needs a closer look.
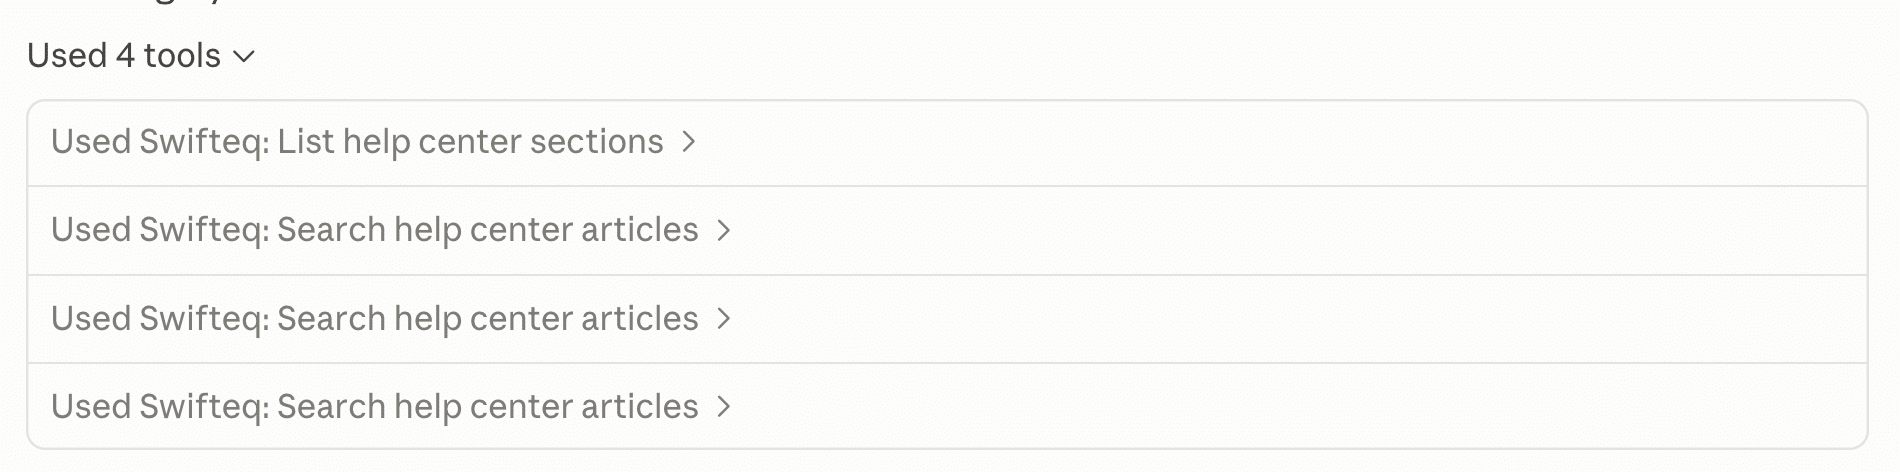
Search on its own narrows things down but cannot decide. Our three searches (“create tickets”, “public replies internal note”, “users and organizations permission”) matched 18, 13 and 15 of the 24 articles, because almost every article mentions tickets or permissions somewhere. Reading the full text is what separates an article that merely mentions a topic from one that says something no longer true.
Tip for large categories: one export of our 24 articles came back as about 175,000 characters, too much to read inside a chat. Claude Code saved it to a file and scanned it with a short script instead. Ask Claude to do the same if your category is large.
Claude read all 24 articles and flagged 8: the tools list, the permissions article, the FAQ, the overview, the limitations list, the troubleshooting article for refused actions, the guide to making changes, and the example prompts. Two of those we would likely have missed on our own: the limitations list, which still said creating tickets was not possible, and the troubleshooting table, which needed the two new messages users could now see.
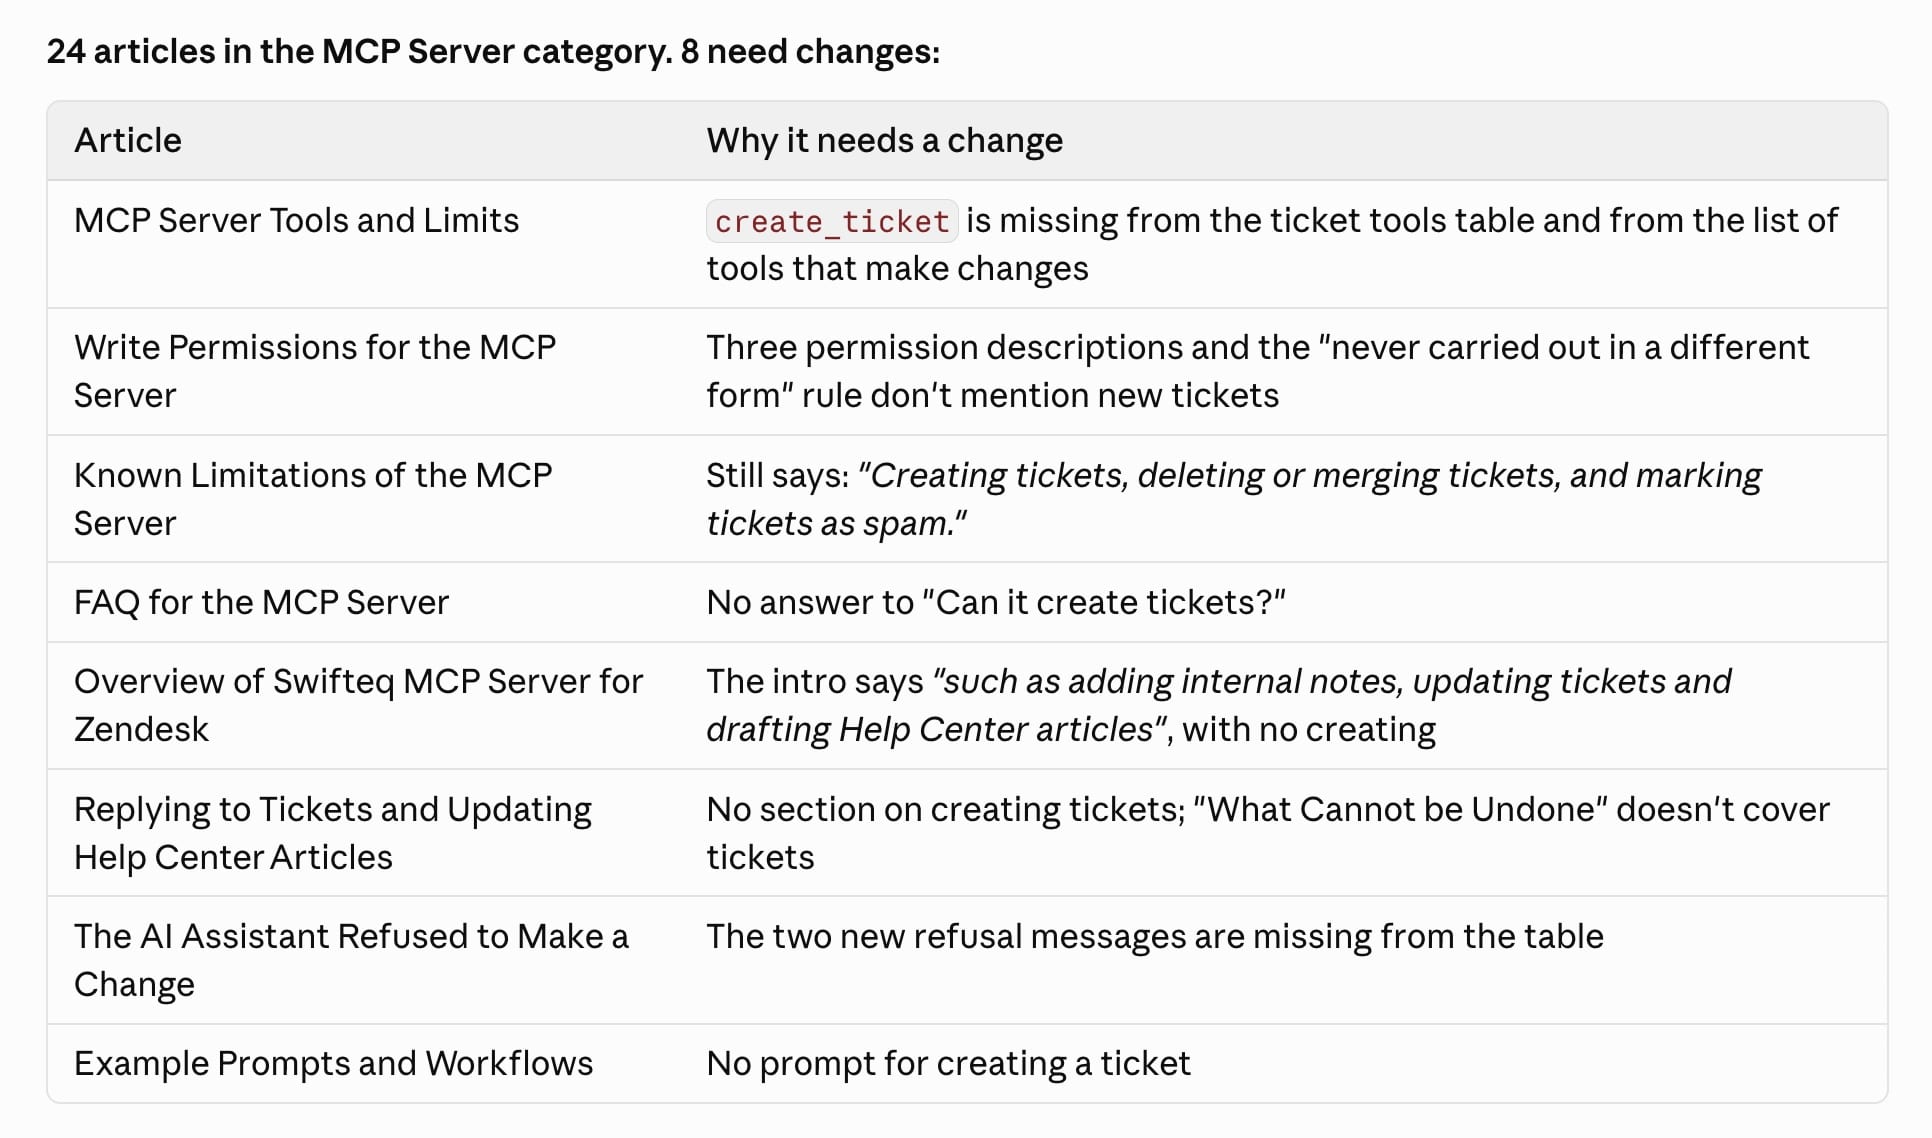
Tip: ask Claude to list each affected article with the exact sentence that needs to change and why. That list becomes your review checklist.
Step 2: Draft the text changes
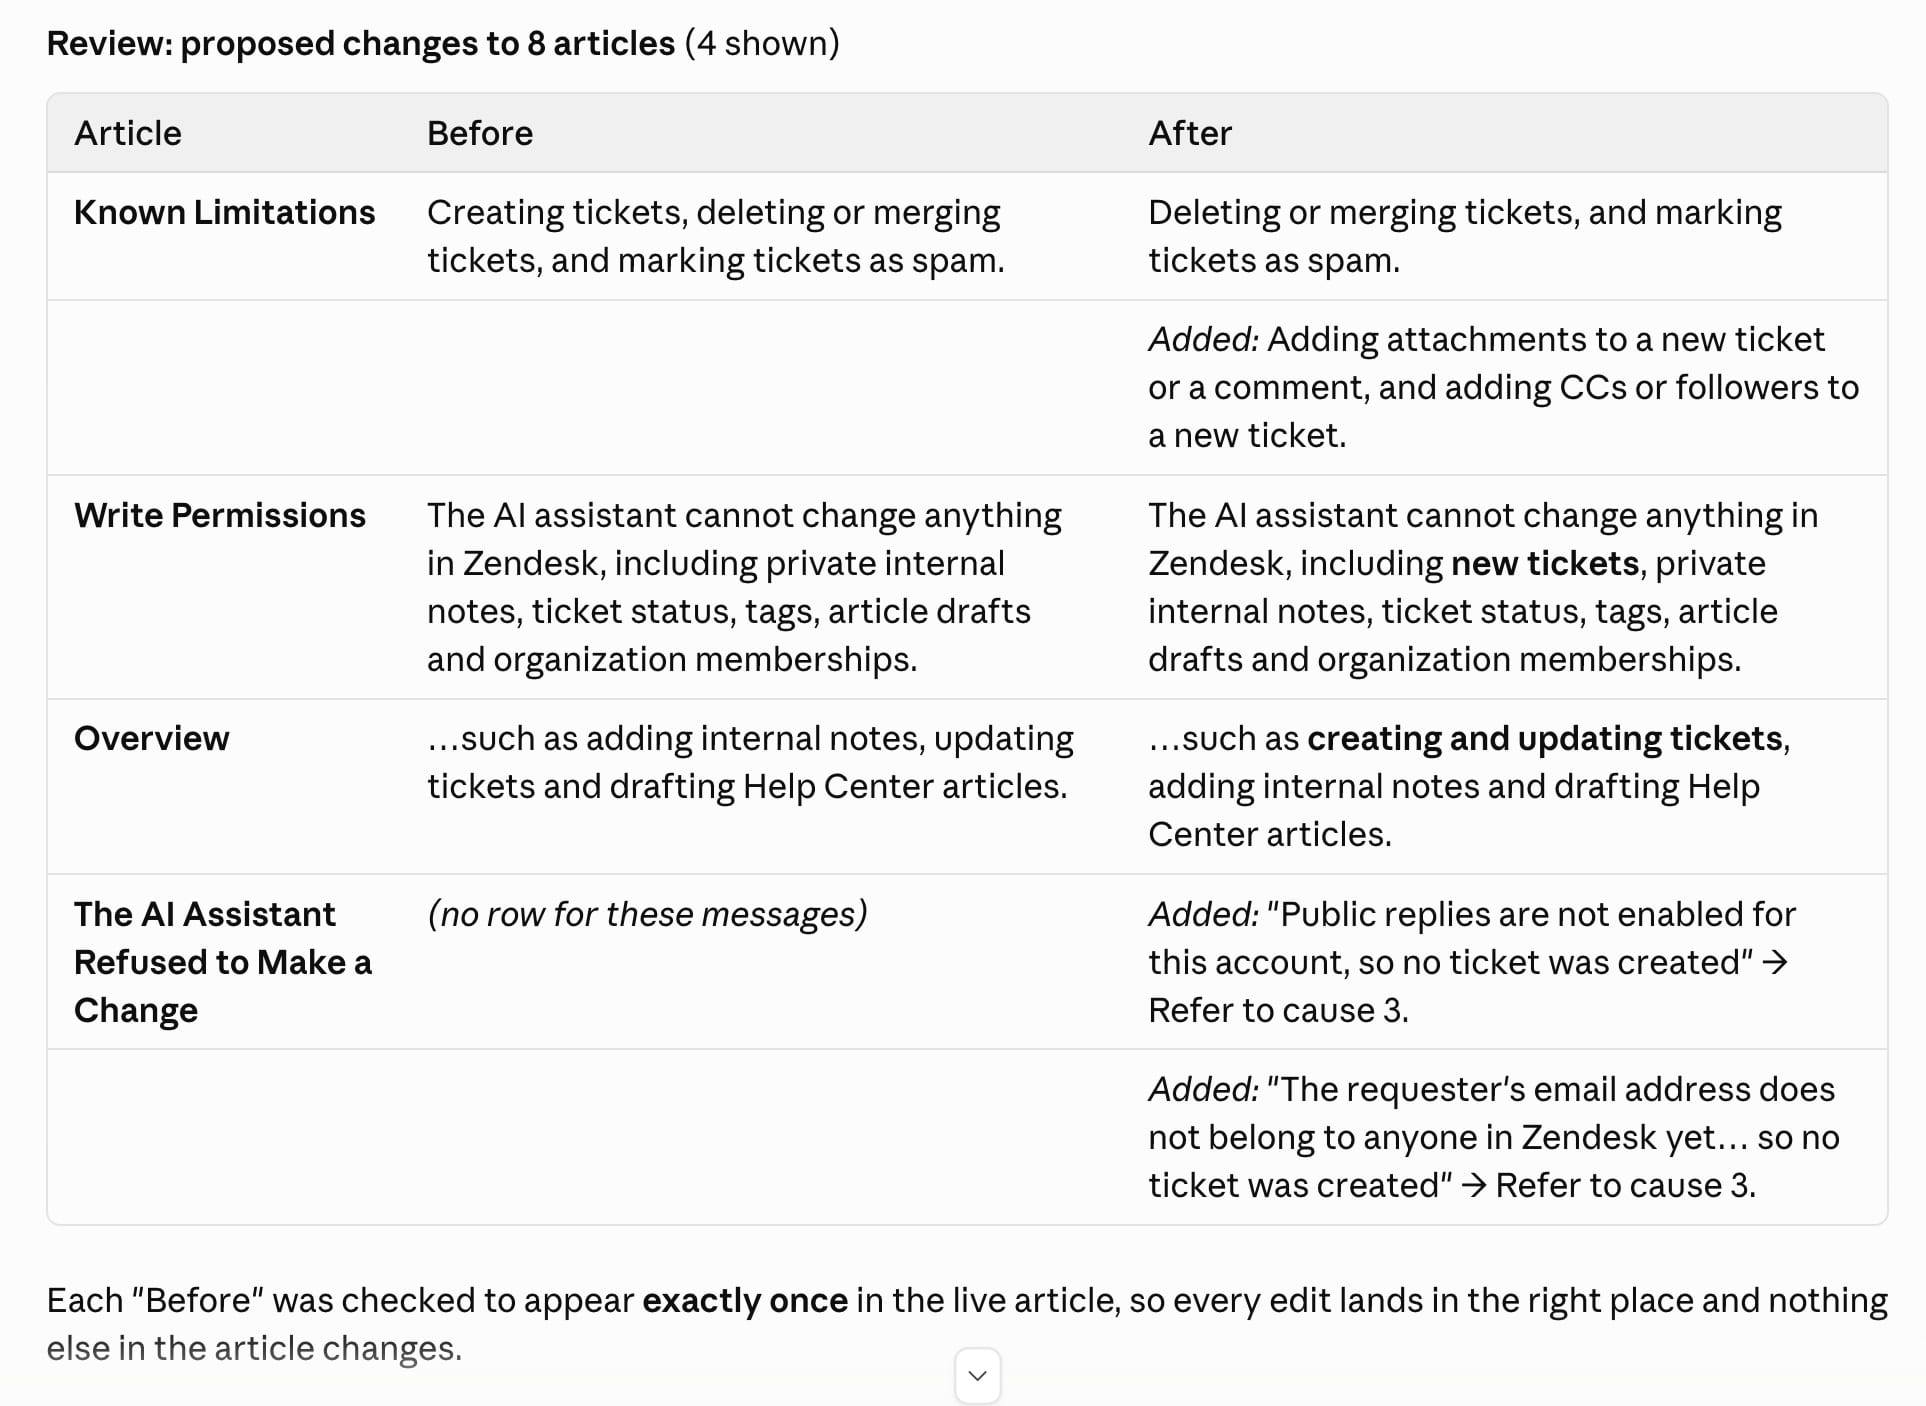
Next, Claude drafts the edits. We found one rule makes all the difference: treat each edit as an exact replacement. Claude quotes the current sentence, writes the new one, and checks that the old sentence appears exactly once in the live article. If it does not, the edit stops instead of guessing.
This keeps every change small and reviewable, and it leaves the rest of the article untouched: headings, links, callouts and anchors stay exactly as they were.
What we asked Claude to do at this step:
- Match the tone and terms already used in each article, and follow our style rules (plain language, no em dashes, the exact names of settings as they appear in the app).
- Add new content where it belongs, for example a new section in the guide to making changes and a new question in the FAQ, with a matching entry in each article’s table of contents.
- Produce a readable diff of all 8 articles for review before anything is published.
No MCP tool writes anything at this step. Claude works from the article bodies it fetched in step 1 and saves the drafts as files.
Step 3: Find the screenshots that need to change
Screenshots are where Help Centers quietly drift out of date, because text search cannot see inside an image.
Claude reads the image links from the article bodies it fetched in step 1, downloads each image in the affected articles, and looks at it. It compares what the image shows with what changed in the release. In our case the permissions article had three screenshots. Two showed the settings page with the old descriptions under each switch and needed retaking. The third showed a dialog that lists only the switch names, which had not changed, so it stayed as it was.
Tip: ask Claude to explain for each image why it does or does not need a new version. “It shows the old description under Allow public ticket replies” is a decision you can check in seconds. “It looks fine” is not.
Step 4: Take the new screenshots automatically
This is the step most teams dread, and the one where Claude saves the most time. Retaking a screenshot well means matching the original exactly: same page, same account state, same crop, same resolution. Doing that by hand for every release is tedious, and inconsistent screenshots make a Help Center look neglected.
Here is how we do it with Claude Code.
1. Use the old screenshot as the specification. Claude studies the existing image: which page, which part of the page, which switches are on or off, which user role is shown. Our two screenshots showed the same settings page as an account owner and as a contributor, so we needed two logins.
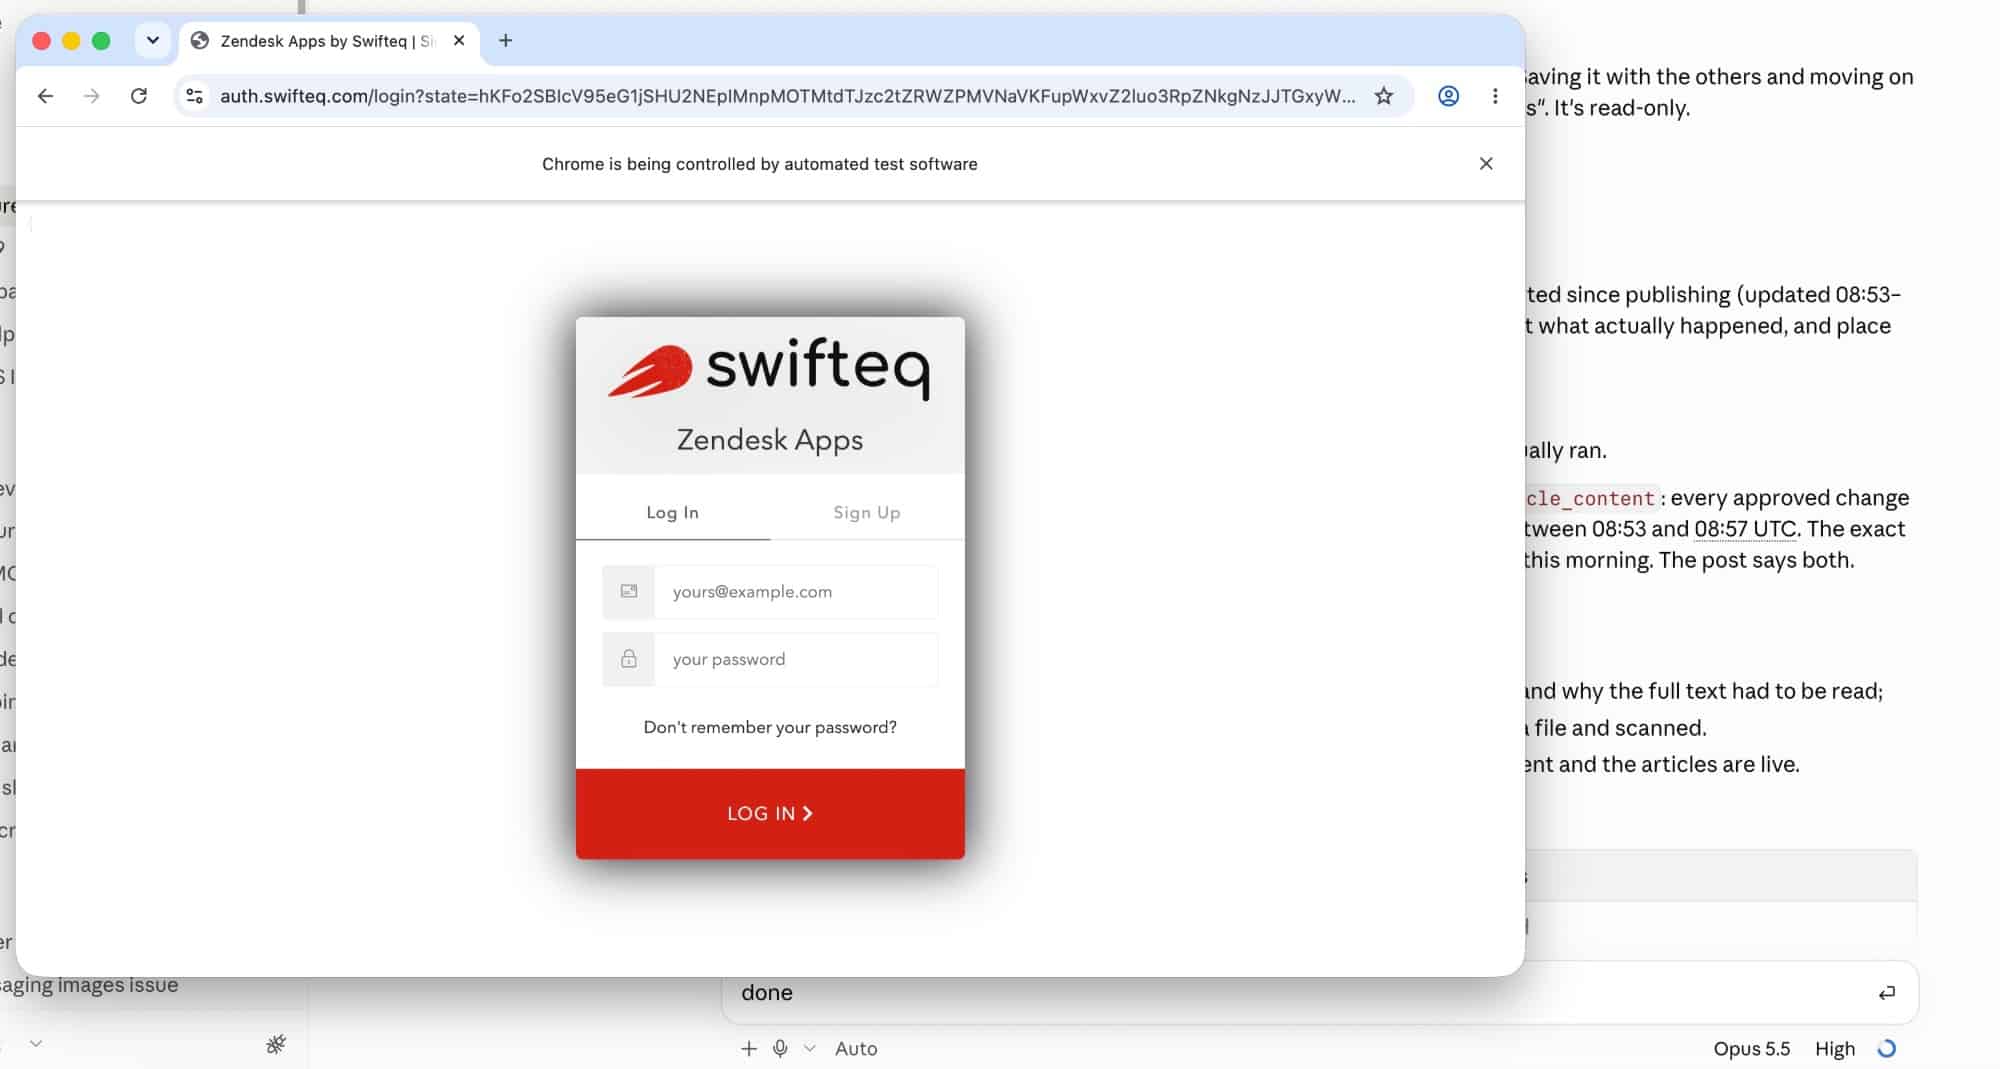
2. You sign in, Claude never sees a password. Claude opens a normal Chrome window on a separate browser profile and waits. You sign in yourself, and the session is kept in that profile folder. Claude then reuses the session in a hidden browser to take the screenshots.
3. Claude writes a small screenshot script. It uses Puppeteer, a free tool that controls Chrome. The script opens the right page, clicks the right tab, finds the element to capture and saves an image cropped exactly around it. The details that make screenshots look professional:
- Capture at double resolution, so images stay sharp on high resolution screens.
- Crop to the element with a small margin, not the whole window.
- Hide floating widgets such as chat bubbles and cookie banners before capturing.
- Use the same browser width as the original screenshots, so text wraps the same way.
4. Read only, always. The script opens pages and clicks tabs, but never clicks Save. If a screenshot needs a dialog open, the script opens it and then clicks Cancel. Ask Claude to confirm afterwards that nothing was saved.
5. Compare old and new. Claude opens both images and checks that the layout and settings match the original and that only the intended text changed. Then it shows you both for approval.
6. Clean up. Delete the browser profile folders when you are done, since they hold a signed in session.
Tips for getting Claude to do this well:
- Name the pages and roles: “Retake the Settings tab screenshot as an owner and as a contributor, matching the current images in the Write Permissions article.”
- Ask for one script per screen and keep it. Next release, the same screenshots take seconds.
- Use a demo or internal account, never a customer’s data.
- If a screenshot shows data, make sure the state matches the original: same toggles, same sample records.
Step 5: Upload the screenshots to the Help Center
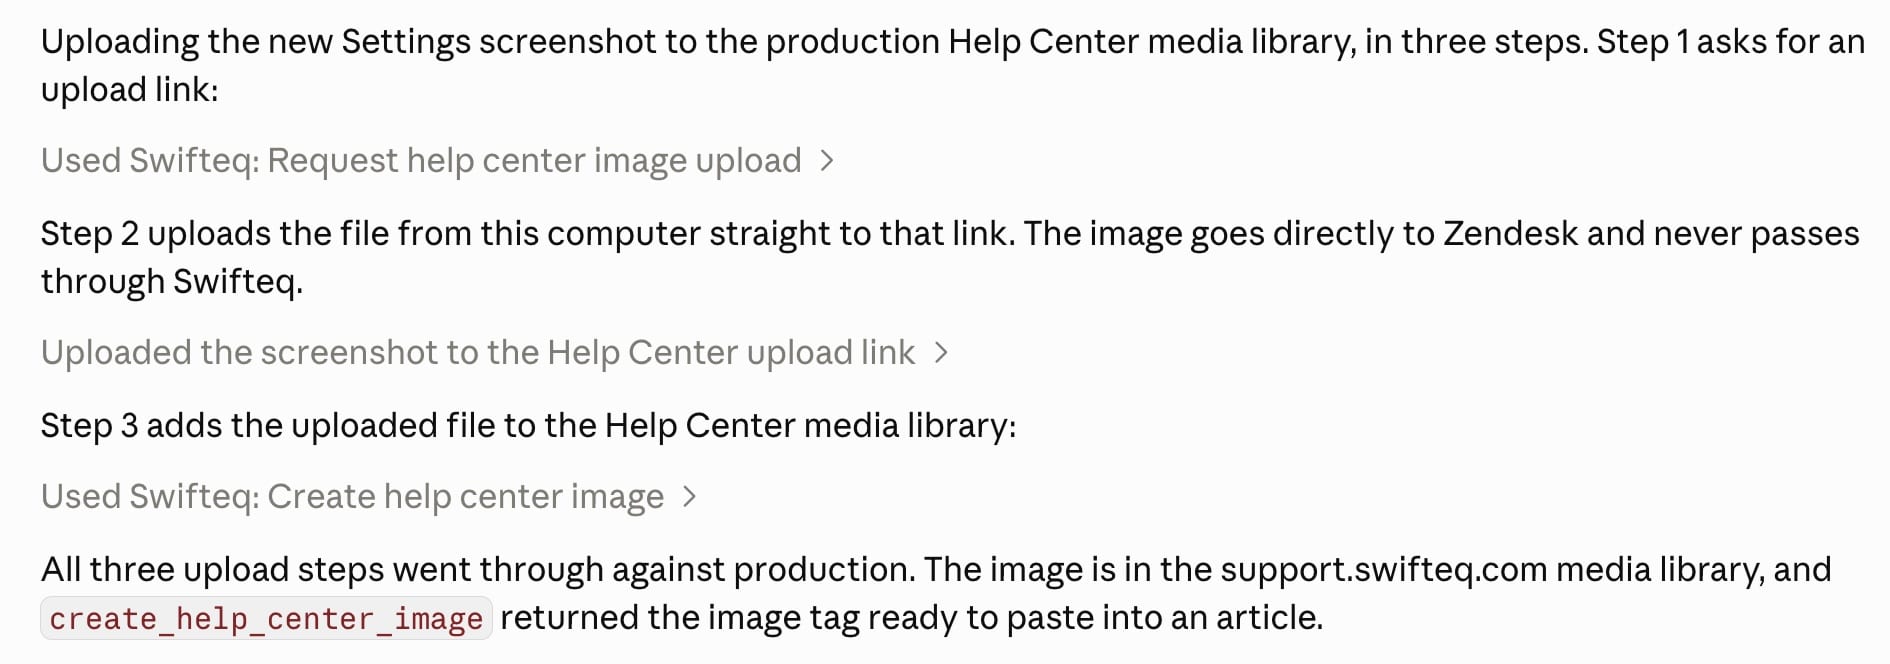
New images go into the Help Center media library before any article points at them. With the MCP Server this takes three short steps, and the image goes straight from your computer to Zendesk.
MCP tools used:
request_help_center_image_upload: Claude gives the file name, type and exact size, and gets back a secure upload link.- Claude Code uploads the file to that link from your computer.
create_help_center_image: adds the image to the media library and returns a ready image tag.
Claude then swaps the old image links in the draft for the new ones, keeping the original alt text. Zendesk attaches the images to the article automatically once the article is saved.
Step 6: Review, publish and verify
Nothing goes live until a person approves it. We review the text diff and the new screenshots together, then tell Claude to publish.
Before publishing, Claude checks that each live article has not changed since it was fetched, so nobody else’s edit is overwritten. Then it publishes and verifies.
MCP tools used:
get_help_center_article_contentto confirm the live article still matches what Claude drafted from.update_article_translationto publish each article, withdraftset to false so the live version is updated directly. (Saving a published article as a draft takes the live version offline until someone republishes it, so decide up front whether Claude publishes or saves drafts for you to publish.)get_help_center_article_contentagain to check each published article contains every approved change and is live, and that the new images load.
In our case, seven articles matched their drafts exactly. The eighth differed only in its image links, because Zendesk turns uploaded images into article attachments when it saves. Knowing that in advance makes the check quick instead of alarming.
A prompt to get you started
Paste this into Claude Code with the Swifteq MCP Server connected, and fill in the parts in brackets.
We just released [short description of the change: new or renamed settings, new options, what is no longer true]. Update our Zendesk Help Center to match.
1. Find every affected article in the [category name] category. Use search_help_center_articles for likely keywords, then export_help_center_articles to read the full text of every article in the category. List each affected article with the exact sentence that needs to change and why.
2. Draft the changes as exact replacements over the live article bodies: quote the current text, write the new text, and check each old text appears exactly once. Keep headings, links and anchors as they are. Follow our style: [your style rules]. Save the drafts as files and show me a readable diff.
3. Download the screenshots in the affected articles, look at each one, and tell me which ones show something that changed and why.
4. For those, write a Puppeteer script that retakes each screenshot to match the original: same page, same crop, double resolution, floating widgets hidden, read only (never click Save). Open a Chrome window for me to sign in; never ask for my password. Show me old and new images side by side.
5. Wait for my approval. Then upload the new images with request_help_center_image_upload and create_help_center_image, put them in the drafts, check each live article has not changed since you fetched it, and publish with update_article_translation (draft false). Verify every published article against its draft and check the images load.
Turn it into a skill after the first run
The first run is where you and Claude work out the details: which categories matter, your style rules, which screenshots exist and how to retake them, where approval happens. Do not let that knowledge disappear when the chat ends.
After the first successful run, ask Claude to create a dedicated skill for it. In Claude Code a skill is a short instruction file Claude loads when a task matches it. Ours holds:
- the steps above, with the approval points marked;
- our style rules for Help Center text;
- the list of categories and sections to scan for each product;
- where the screenshot scripts live and which account and role each one needs;
- things we learned the hard way, like Zendesk rewriting image links on save, and checking the live article has not changed before publishing.
Then keep the skill up to date. Each time a run teaches you something (a new screen to capture, a style rule someone flagged in review, a step that needed a second try), ask Claude to add it to the skill at the end of the session. After a few releases, updating the Help Center becomes a single request: “The release is out, update the Help Center.”
Where to go from here
- See every Help Center tool the MCP Server offers in MCP Server Tools and Limits.
- Decide who can publish directly with Write Permissions for the MCP Server.
- Get started with the Swifteq MCP Server for Zendesk. It is free for up to 500 calls a month per Zendesk account.